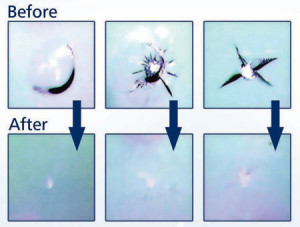
 Anyone with a car will know that windshield chips are the worst. Well, not the worst that can happen, but they are very annoying. You shouldn’t drive around with a chip in your windshield, but you don’t want to pay the money to fix it or replace it completely because it’s such a small thing. It can be a frustrating issue, but the good news is that you can repair a chip in your windshield yourself and save some money. Here’s how.
- Inspect the chip carefully
After noticing you have a chip, the first thing you need to do is drive home and then look at it. Take out the magnifying mirror, if you need to, and inspect the chip closely. How deep is it? How large? Is it just chipped glass, or is it a small crack? It’s important to note the difference because the repairing techniques are not the same. Once you have confirmed that it’s just a chip and not a big deal (although not all insurance will cover chips), you can go ahead and start the repairing process.
- Purchase the necessary equipment
Most people don’t know this, but you can find a windshield chip repair kit pretty easily. However, make sure you get a quality one and not a cheap one as it will make a huge difference on your windshield.
- Prep your surface
Before you start on the rock chip repair, make sure that your windshield is completely dry and at room temperature. The reason for this is that you don’t want to trap any moisture inside the chip. So take your car somewhere indoors and make sure your surface is clean and dry (use a hairdryer, if you must).
- Repair the chip
Your windshield chip repair kit will contain an adhesive and a syringe you can use to apply the glue. You will put the adhesive strip on the windshield, covering your rock chip. The syringe will go vertically, and you will need to pull it out to maximum capacity. This acts as a way to pull a vacuum into the syringe and the crack. Holding this allows the adhesive to trickle down into the chip or crack while the air bubbles up inside the syringe. Hold it like this for a full minute, and then let go. You can repeat this motion a few times until the chip fills up with glue. Once you’ve finished, remove everything from the windshield.
- Clean and finalize
You will notice that upon taking off the adhesive strip, you will have leftover glue on your windshield. This can be easily taken care of with a paper towel soaked in alcohol. However, be careful not to touch the adhesive on the chip – let it sit for a few hours. After the glue has hardened sufficiently, simply take a blade and razor off the excess. You can perform this action in a single motion if it’s sharp enough; if not, work bit by bit until the excess adhesive is gone.
That’s it! Just a little time and a windshield chip repair kit to do the job. If you have any questions, please contact us and we will help you through the process…
